For this tutorial you will need a graphic, tube and font. I have supplied what I used, but feel free to use your own!!
1. Open your images in PSP. Shift+D to duplicate, then close the originals.
Pick a light color from your graphic for the Foreground, and a darker color for your Background.
Working with the card "cover", the image that will be curling, Selections-Select All.
Selections-Modify-Contract by 10 px.
Selections-Float.
Effects-3d-Cutout with V & H at 0, Opacity 100% and Blur at 10.
Selections-Defloat.
Selections-Invert.
Flood fill the selection with a pattern or color.
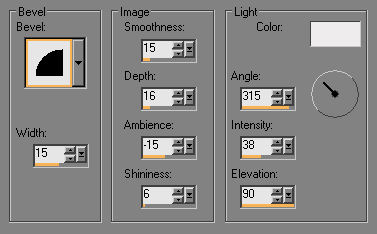
Effects-3d-Inner Bevel with these settings.
If you want to add text to your cover, now would be a good time :-)
When you are happy with it, Layers-Merge-Merge All.
2. Activate your tube. Edit-Copy.
Activate your cover. Edit-Paste-As a New Layer.
In your layer palate, left click and hold on your tube layer and drag it to the bottom.
In your layer palate, close the eye on the cover and highlight the tube layer.
Now, we're going to do the Inside of the card :-)
3. With the tube layer active, add a new raster layer. Drag this layer to the bottom. Flood fill it with a pattern or color.
Selections-Select All.
Selections-Modify-Contract, by 10 px.
Selections-Float.
Effects-3d-Cutout with V & H at 0, Opacity 100% and Blur at 10.
Selections-Defloat.
Selections-Invert.
Flood fill the selection with a pattern or color.
Effects-3d-Inner Bevel with the same settings as in step 1.
Selections-None.
4. Highlight your tube layer. With the Mover tool move the tube to give you a little room to add text.
Effects-3d-Drop Shadow with V & H at 3, Opacity 100% and Blur 5.
Add your text. I used OldCentury, stroke width 1, create as Vector, foreground set to a dark color and a pattern as the background.
I like to add text as Vector because you can pull or push on the nodes to make it just the right size.
Once you have your text sized and where you want it, right click on that layer in the layer palate and Convert to Raster Layer.
Effects-3d-Inner Bevel with the last settings.
Effects-3d-Drop Shadow with the last settings.
Layers-Merge-Merge Visible.
Now you should be back to 2 layers....the completed cover and the completed inside.
Close off the inside layer, open the cover layer and highlight it.
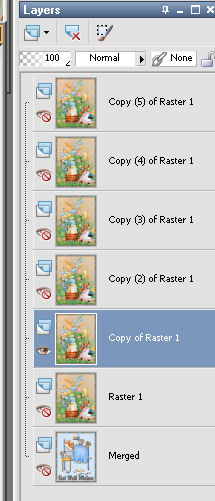
5. Right click in the layer palate on the cover layer, and Duplicate this layer 5 times to make a total of 6 copies of this layer.
Close off all layers except the first Copy of Raster 1 and make sure that layer is highlighted.
Effects-Graphics Plus-Page Curl at the default settings.
Close that layer, open and highlight Copy 2 of Raster 1.
Effects-Graphics Plus-Page Curl changing the size to 210.
Close copy 2 of Raster 1, open copy 3 and highlight it.
Effects-Graphics Plus-Page Curl changing the size to 225.
Close copy 3 of Raster 1, open copy 4 and highlight it.
Effects-Graphics Plus-Page Curl changing the size to 235.
Close copy 4 of Raster 1, open copy 5 and highlight it.
Effects-Graphics Plus-Page Curl changing the size to 240.
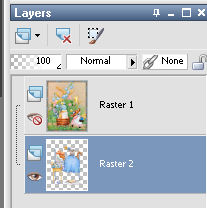
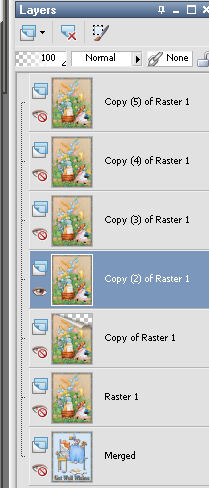
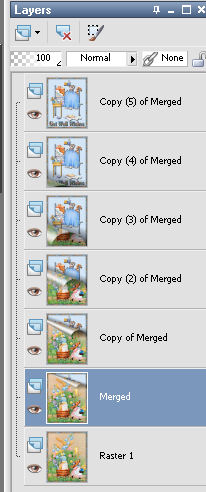
Close all layers. Highlight the inside layer and drag it up one layer.
Your layer palate should look like this right now and your canvas blank.
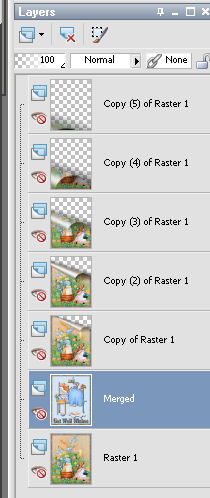
Right click in the layer palate on your inside layer and Duplicate. Drag the new layer above Copy of Raster 1.
Right click on Copy of Merged and Duplicate, Drag that layer above Copy 2 of Raster 1.
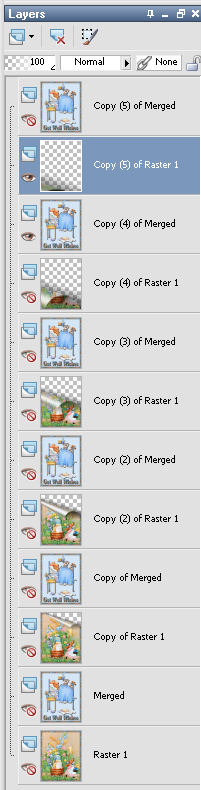
Continue this until you have the inside as the top layer like this.
Open Copy 5 of Raster 1 and Copy 4 of Merged.
Right click on Copy 5 of Raster 1 and Merge-Merge Down.
Close Copy 4 of Merged and open Copy 4 of raster 1 and Copy 3 of Merged, Highlight Copy 4 of raster 1 and Merge-Merge Down.
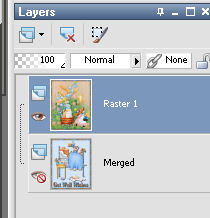
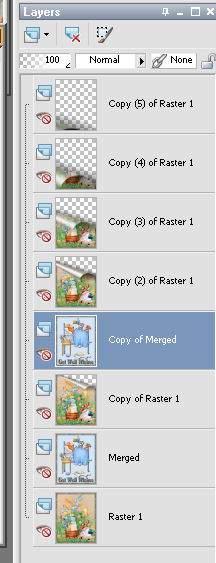
Continue to merge the cover and inside layers until your layer palate looks like this, with the whole inside layer on top and the whole cover on the bottom.
6. Open the "eyes" on all merged layers.
Now is the time to Resize your card if the dimensions are on the large size.
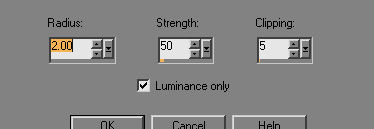
If you Resize now, be sure after you do that to highlight each layer (start at the top or bottom and work the other way), then Adjust-Sharpen-Unsharp Mask with these settings.
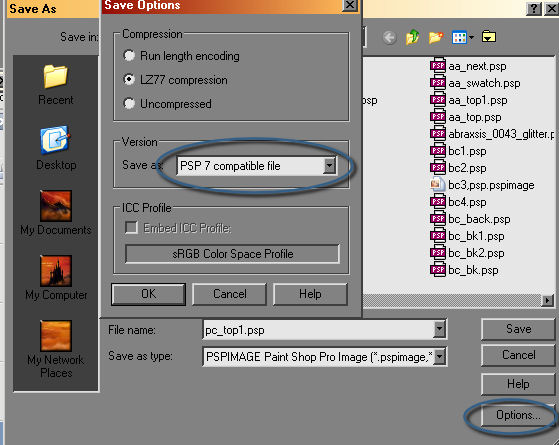
File-Save As, name your card and save as a .psp file.
One important note, you Must save it as a PSP7 compatible file. To do this, before you click on Save, click on Options, and in the new window choose PSP7 compatible from the dropdown.
Almost done!!
Now we just need to animate it :-)
7. Open Animation Shop.
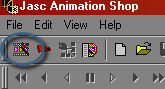
Click on the Wizard icon just under File.
In the first window tick Same size as the first image frame and click Next.
Next window tick Opaque with black as the color and click Next.
New window tick Upper left corner and With the canvas color, Next.
In this window tick Yes, repeat the animation indefinately, and set the speed at 35, Next.
Now, click on Add images, browse to where you saved the file, choose it and Open, then Next and then Finish in the last window.
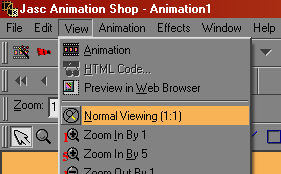
If you only see 1 frame in the workspace, go up to View and Normal Viewing(1:1).
You will need to see all the frames :-)
Go to View-Animation and you can see it play!
Close the playing animation because we need to do a little work on it.
Click in frame one to activate it, you will now see it is surrounded by bright blue.
Right click inside frame one and choose Frame Properties.
Change the speed to 100.
Using the slider bar at the bottom of your "film strip", take it to the right until you get to the last frame.
You can tell it's the last frame because there will be a blank frame after, and underneath the last frame it will have F7 D 35.
Click inside the last frame, then right click inside the frame and again to Frame Properties changing the speed to 100.
Now, go to View-Animation.
By changing the speed of the first and last frames, you now see the cover whole for a few moments and then the inside long enough to see and read before the animation begins again :-)
If you are not happy with how it looks, play with the speed settings until it suits you :-)
Now that you're happy with it, go to File-Save As and save as a gif file.
Give yourself a pat on the back now....you're done!!