For this tutorial you will need a graphic and a tube.
No outside filters were used.
Also, feel free to be creative and use anything with outspread wings!! Birds, dragonflies, bees, angels....... :-)
1. Open your choosen graphic in PSP. Shift+D to duplicate, then close the original.
Pick a light color from your graphic for the Foreground, and a darker color for your Background.
Resize your image so 350px is the "long side". For example, 350px wide and say 300px high, or 300px wide and 350px high.
Images-Add Border. 2px Symetrical, with either your Foreground color or Background, depending on which would look better to you :-)
If you have a light graphic, your dark Background color may look better, or if your graphic is darker, the lighter Foreground color may be better.
With your magic wand, click on the 2 px border.
Selections-Invert.
Selections-Float.
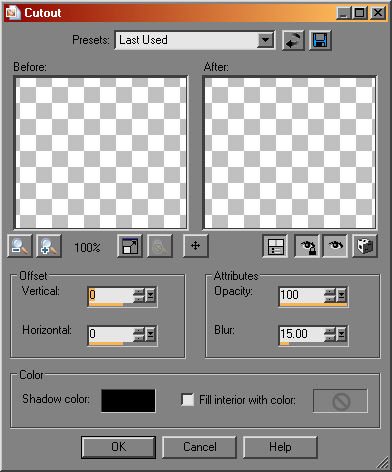
Effects-3d-Cutout with these settings.
Selections-None
Images-Add Border, 2px your second color.
Images-Add Border, 2px first color.
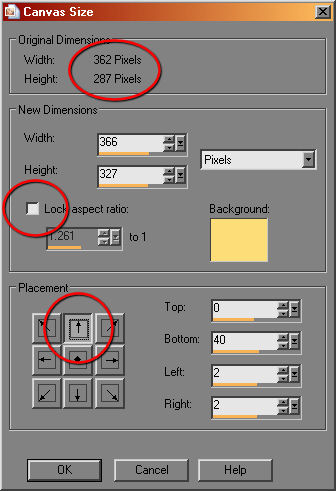
2. Image-Canvas Size with the settings as below, with the Background your second color, but Don't click OK yet!!
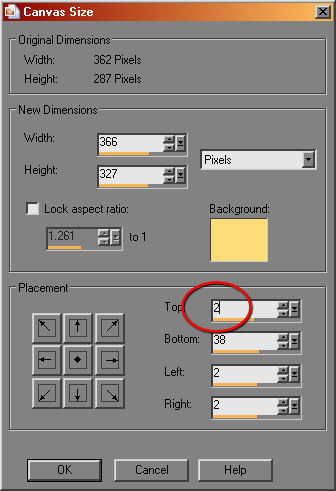
Before you click on OK, change the number in the Top box from 0 to 2 as below and Then click on OK :-)
Image-Add Border, 2px your first color.
Image-Add Border, 2px your second color.
Image-Add Border, 2px your first color.
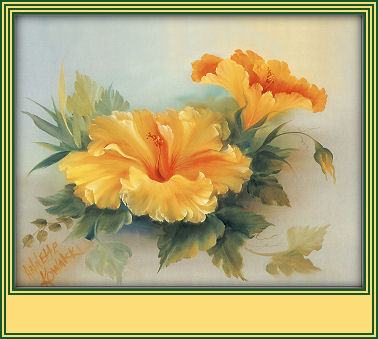
Now you should have something that looks like this.
3. You can skip this part if you wish :-)
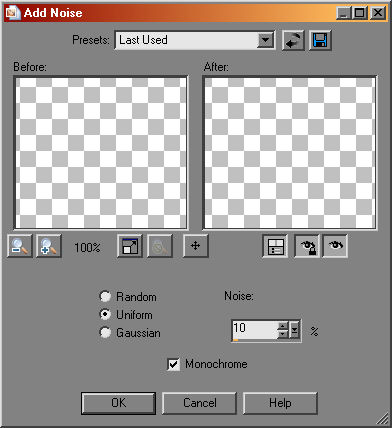
I wanted to give my frame background some texture, so I picked the background with the Magic Wand, Adjust-Add/Remove Noise-Add Noise with these settings.
While still selected, Selections-Float.
Effects-3d-Cutout as in step 1.
Selections-None.
4. Add text as desired.
Layers-Merge-Merge All.
Here's how mine looks at this point.
5. Our Background is complete now and it's time to work on the butterfly :-)
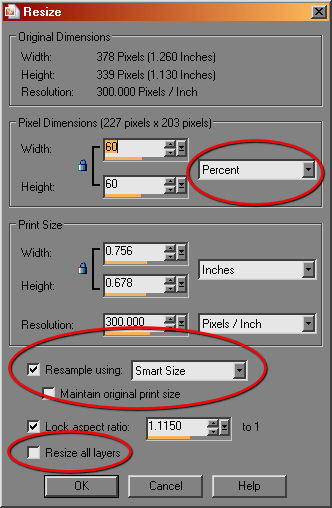
For the tube I used, I need to reduce the size of the butterfly by 60% ....Activate the butterfly tube, Image-Resize with these settings.
If you use a different tube, you may need to adjust the percent.
With the butterfly tube still activated, Edit-Copy.
Activate your Background image.
Edit-Paste-As a new layer.
With your Mover Tool, move the butterfly to where you like it.
Also, for the tube I used, I wanted to rotate it.
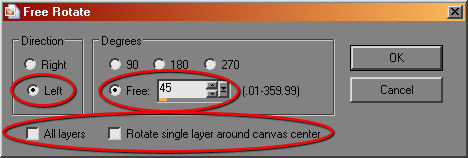
6. Optional, Image-Free Rotate with these settings.
You many need to rotate to the Right instead of Left, depending on the tube you use and where you want to place it.
Now you should have your butterfly placed where and how you want it.
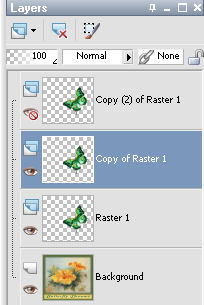
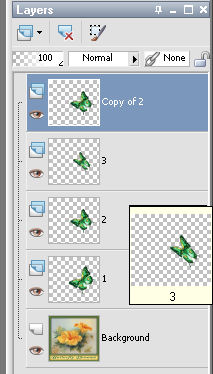
7. Right click on the butterfly layer in your layer palate and Duplicate it twice. Close off the top butterfly layer and Highlight the Middle butterfly layer so your layer palate looks like this.
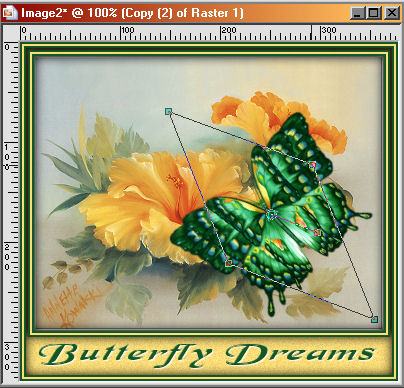
Pick your Deformation Tool.
Now you should have a Bounding Box around your butterfly as below.
With your cursor, left click on the bottom left corner node when the icon changes from an arrow to 4 little diamonds, and while holding the left click, move your mouse toward the center of the butterfly.
Repeat with the upper right node pulling it toward the center of the butterfly.
You should have something that looks like this now.
Your bottom butterfly layer is open, so you can see how much you are "moving" the wings and if they are even.
8. Unlock and Highlight the top butterfly layer.
Again, left click on the bottom left corner and drag it closer to the center of the butterfly, then drag the upper right node closer too.
Now you should have something like this.
I don't usually rename my layers because I can look at them and know where I am :-) But, to make it easier to explain here, I renamed the first butterfly layer, the full size one, to 1. The second butterfly layer is 2, that is the first we used the deform tool on. And 3 is the top that we adjusted last.
Highlight butterfly 2 and Layer-Duplicate.
Move the duplicated layer to the top.
You now have a full cycle of the butterfly open, closing, closed, opening.
We're almost done!! LOL
9. Back to your layer palate, highlight the Background layer, right click and Duplicate. Left click on this new layer and drag it up to just below butterfly layer 2.
Right click on that background layer and Duplicate then Left click on it and drag it to just below the next butterfly layer.
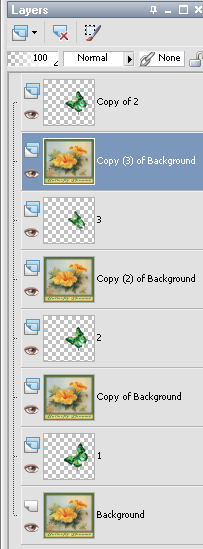
One last time, right click on the background layer, duplicate, and left click and drag it to just below the top butterfly layer.
You layer palate should look like this now, butterfly layer, background 4 times.
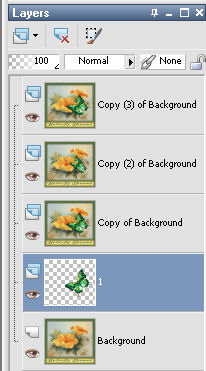
Highlight the top butterfly layer. Layers-Merge-Merge Down.
Highlight the second layer down now, the topmost single butterfly layer and Layers-Merge-Merge Down.
Now Highlight the third layer down and Layers-Merge-Merge Down.
Last time, Highlight the 4th layer down, the last single butterfly and Layers-Merge-Merge Down.
You now should have 4 layers.
File-Save as, give it a name you will remember and save as a .psp file.
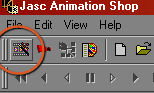
10. Open Animation Shop.
Click on the Wizard icon just under the File option.
In the first window check Same size as the first frame.
Next window check Opaque with black as the background.
Next window, Upperleft corner and With canvas color checked.
Next window, check Yes, repeat the animation indefinately, frame speed at 20.
Then click on Add Image and locate the file you saved.
Click on Next and then Finish.
Now, click on View-Animation.
If you are happy with it, go to File-Save as, save it to a folder of your choice.
If you are Not happy with it, you can close the moving animation and right click on each frame to change the speed to something slower or faster. Then again, View the animation, and Save as when you are happy with it :-)
I used the same idea to make the Back button below :-)
Hope you have fun with it!!