For this tutorial you will need a graphic.
No outside filters are used.
I will call this Beginners.
Open your chosen graphic in PSP. Shift+D to duplicate, then close the original.
Also open the font and Gradient in PSP. Even if you saved the Gradient to your folder for those, open it in PSP as an image.
Activate your graphic.
We are going to start by creating a color swatch.
A swatch can be very handy if you are using more than 2 colors.
PSP does keep track of Recent colors, but it is So much easier to just click on the swatch and pick a color.
File-New Image.
200px x 50px, Raster and Transparent.
Choose your Paint Brush Tool with these settings.
You are going to pick 6 colors from your graphic :-)
start with a very light color for the Foregound, and a Darker of the same color for the Background.
Or if you're using the rainbow gradient, start at one side and work to the other.
With Foreground and Background choosen, at the far left side of your blank Swatch, "paint" your Foreground.
Move to the right so most of the Foregound color is visible and "paint" your Background color.
Choose 2 new colors for your Foregound and Background.
Paint them on your Swatch.
One more time, choose 2 new colors and "paint" them on your swatch.
Now you should have a swatch that looks like this.
The swatch you see here is the one I made for the example at the bottom of this page.
No need to be precise in placing your colors in the swatch, no one will ever see it but you :-)
***Image-Add Borders.
3px Symetrical, click in the color box and pick the first color from your swatch.***
Repeat the 3 px borders until you have picked all 6 of your colors.
Selections-Select All.
Selections-Modify-Contract, by 18.
Selections-Invert.
Adjust-Blur-Gaussian Blur, by 2.
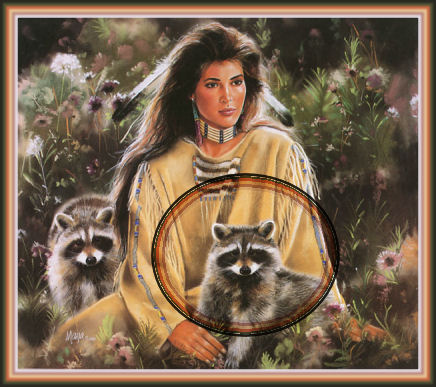
You are done with the Frame and can look at the examples above and below to see how it looks :-)
Choose your Preset Shape tool with these settings.
Set your Foreground to the last color in your swatch and set your Background to Null.
Choose your shape by clicking on the little arrow next to the heart in my example above.
Draw your shape about where you want it, and then using the nodes to adjust the size and shape, squish and pull it till it frames your Feature.
We will be adding the 15px inner frame inside this border, so make sure it is not too close to your Feature.
We drew this as a Vector so we would have the nodes to adjust the shape, now, in your layer palette, right click on the shape layer and Convert to Raster.
You should now have 2 layers, the main pic and the inner frame, keep the inner frame layer active.
With your Magic Wand, click inside the shape.
Selections-Modify-Expand by 1.
Choose your Flood fill tool.
***Make your Foreground color the fifth color in your swatch and fill the selection.
Selections-Modify-Contract by 3.
On your keyboard, hit the Delete key.***
Repeat the steps between the ***, changing the color each time until you have all the colors from your swatch used.
Selections-None.
Adjust-Blur-Gaussian Blur, by 2.
I used a Drop Shadow on mine, color White, V&H at 0, Opacity at 100 and Blur at 10.
I repeated the Drop Shadow to make it Glow more :-)
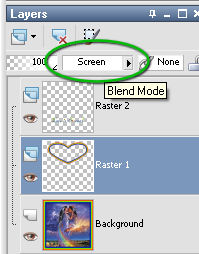
In your Layer palette, change the Blend Mode to Screen.
For the example below, I changed the Blend Mode to Multiply, try different ones to see what you like best!!
Add text if desired.
I used the same drop shadow as on the inner frame.
Layers-Merge-Merge All
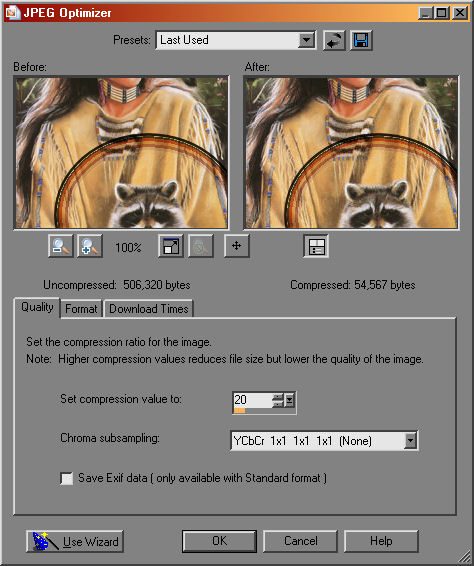
File-Export-JPEG optomizer with these settings.
Give it a name and save it to the desired folder :-)
You're Finished!!
I hope you enjoyed it :-)
I cannot make out the artist of this Beautiful graphic.