For this tutorial you will need a graphic of your choice. I do not know the artists of the graphics I used, therefore will not post them to use.
1. Open your image in PSP. Shift+D to duplicate, then close the original.
Image-Add Borders-3 px symetrical, white.
2. Click the white border with your Magic Wand, Tolerance and Feather set to 0.
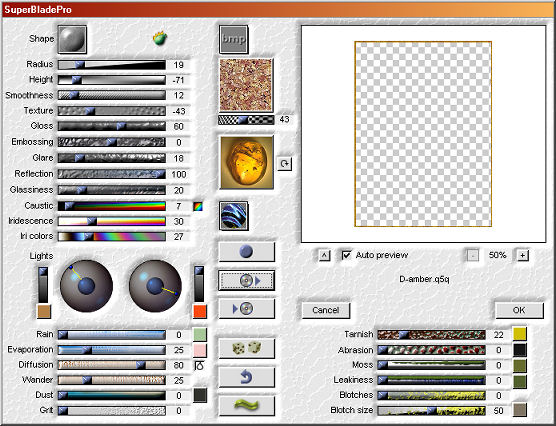
Effects-Flaming Pear-SuperBladePro. Find D-amber.q5q, with these settings.
Click OK.
Adjust-Brightness and Contrast-Brightness and Contrast with Brightness at 33 and Contrast at 15, OK.
3. Selections-Invert.
Effects-3D effects-Cutout. V and H at 0, Opacity 100 and Blur 6.0. OK.
Selections-None.
4. In your Materials Palate, pick a light color from your graphic for the Foreground and a dark color for the Background.
Image-Add Borders-10 px symetrical, your background color.
Hint!! If you right click in the color box within the Add Borders window a new little window will pop up. In the very bottom left of that window you will see your Foreground and Background colors. Just click on the Background color and Voila!!
Click on the dark border with your Magic Wand.
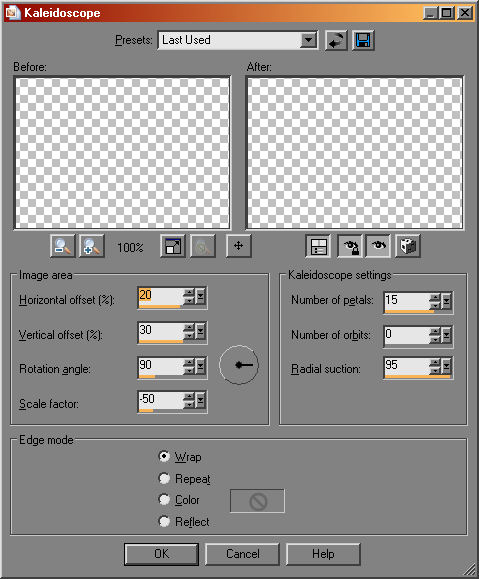
5. Effects-Reflection effects-Kaleidoscope with these settings.
6. Effects-3d effects-Cutout-same as in step 3.
Selections-None.
7. Repeat step 2.
8. Right click on the top bar of your graphic and then click on Copy.
9. Image-Add Borders-30 px, white. With your Magic Wand click in the white border. Right click on the top bar of your graphic and click on Paste-Paste into Selection.
Selections-None.
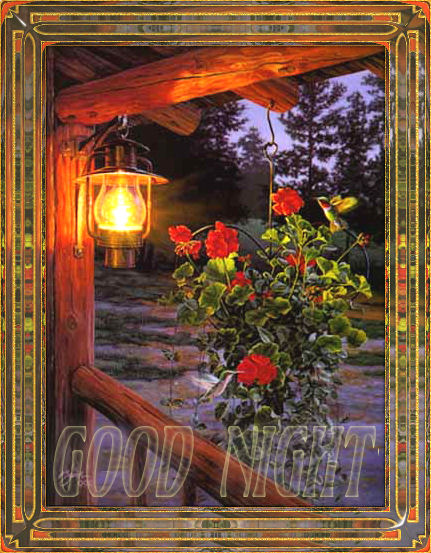
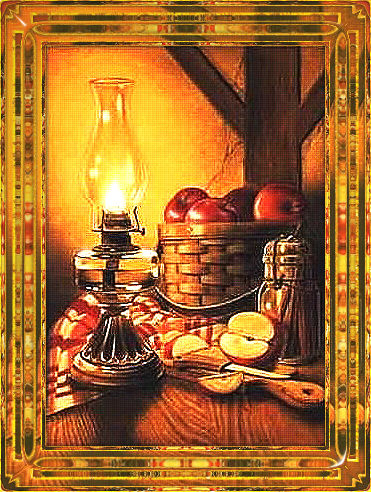
Now, your image should look something like this.
10. Selections-Select All. Selections-Modify-Contract 46.
Selections-Invert.
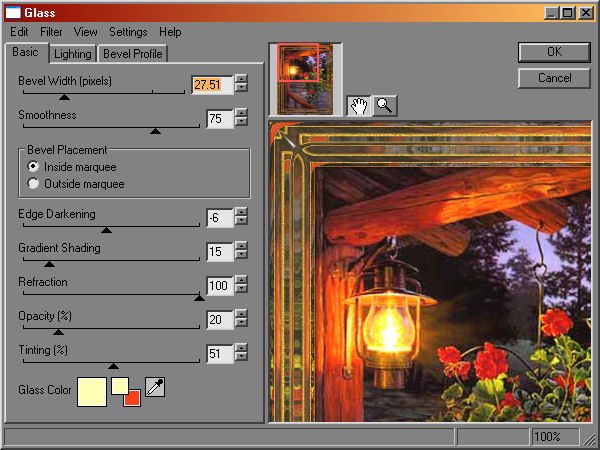
Effects-Eye Candy 4-Glass with these settings.
For the Glass Color, your foreground and background colors are displayed next to that box, click on the foreground color.
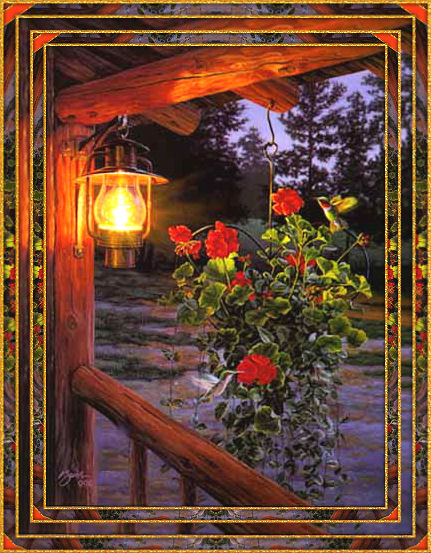
You're Done!!
Add text if you wish and save.

My Terms of Use for this tutorial are as follows: You may send the link to this tutorial, but Not the tutorial itself, to whomever you think will have fun with it. Groups are welcome to use the tutorial, but I would like to know first :-) Please drop me a note of request Here before posting in a group setting.
This page and tutorial are copyright to Janie Shipman, September 2006.
This site is best viewed at 1024x768, in Internet Explorer 6+.