For this tutorial you will need a graphic, tall or wide doesn't matter.
No outside filters are used in this tut.
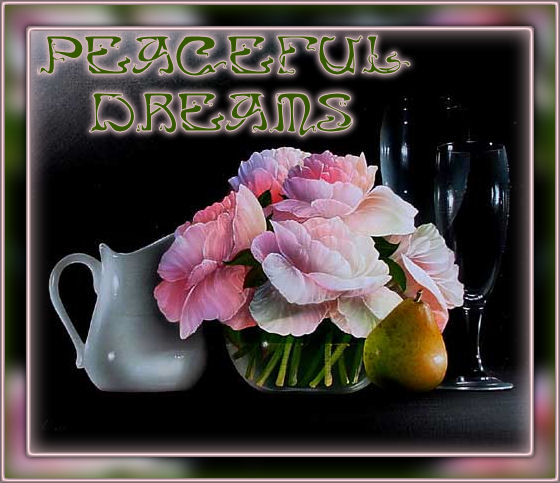
I will call this one Beginners.
Open the graphic you wish to use, Shift+D to duplicate it, then close the original.
Choose a light color from your graphic for the Foreground color and a Dark color for the Background.
Selections-Select All. Selections-Float. Selections-Defloat.
Effects-3d-Cutout with these settings, and click OK.
I used the light Foreground color for the Cutout because the graphic was dark, for a lighter graphic you would want to use black or your dark Background color.
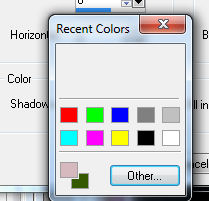
***Hint*** If you Right-click in the Shadow Color box another little window will come up, the top box would normally show recently used colors, the middle box basic colors, and at the bottom left your foreground and background colors....just click in any of the little color boxes to choose it.
With the graphic still "Selected", Selections-Load/Save Selection-Save Selection to Alpha Channel.
Simply click Save in the next window.
Don't worry about remembering anything about how to find it, the Alpha Channel saves to this image only :-)
Selections-Select None.
Edit-Copy.
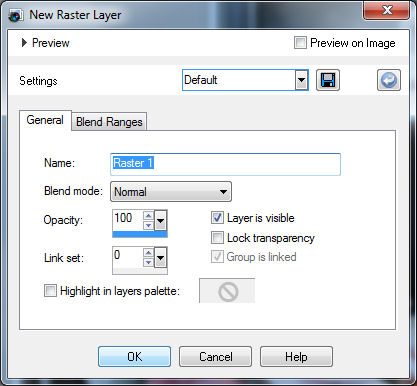
Layers-New Raster Layer, click OK with these settings.
In your Layer palette, right click on the Background layer and choose Promote Background Layer.
Left-click on the Top Layer in your layer palette to highlight it.
Layers-Arrange-Send to Bottom.
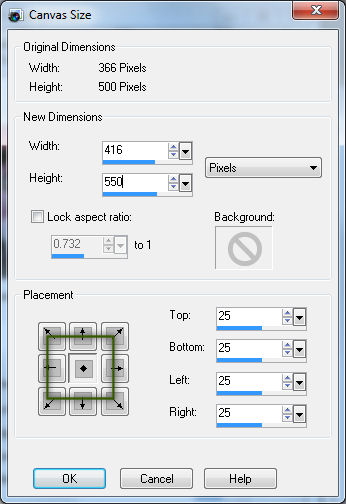
With the bottom transparant layer active, Image-Canvas Size.
At the Top of the new window, is the size of your original image, in this case, a Taller rather than Wider graphic.
In the New Dimensions, with Pixels, add 50 to each side.
In the Placement at the bottom, click on the Center arrow.
To the right on the Placement arrows area, you can see this will give you 25 pixels on each side. Click OK.
Still on the bottom layer, Selections-Select All.
Edit-Paste Into Selection. Selections-Select None.
Effects-Image Effects-Seamless Tiling with these settings, click OK.
Adjust-Blur-Gaussian Blur, with a Radius of 10, Click OK.
Activate the Top layer in your layer palette by Left-clicking on it.
Selections-Load/Save Selections-Load Selection from Alpha Channel.
In the next window, just click OK.
You should now have the original graphic selected :-)
Selections-Modify-Expand, number of pixels, 4. Click OK.
Layers-New Raster Layer, settings same as before.
Floodfill this layer with your light Foreground color.
Selections-Modify-Contract, number of pixels 5.
Hit the Delete key on your keyboard.
Selections-Select None.
Selections-Select All. Selections-Float. Selections-Defloat.
Effects-3d-Inner Bevel with these settings.
Layers-Merge-Merge Down.
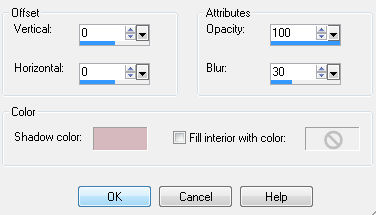
Effects-3d-Drop Shadow with these settings.
Layers-Merge-Merge All.
Selections-Select All. Selections-Float. Selections-Defloat.
Effects-3d-Cutout. Same as before, except I picked the dark background for color.
Selections-Select None.
Image-Add Borders. 5 pixels symetrical in your light Foreground color.
With your Magic Wand, pick this border and Effects-Inner Bevel, same settings as before.
If you wish to add text, for my dark pics, I reversed the Foreground and Background colors by clicking on the arrow between them.
For this font included, I set the size to 12, and Stroke width to 1.
I Always create text as a Vector, which allows you to Drag the sides out to the size you wish :-)
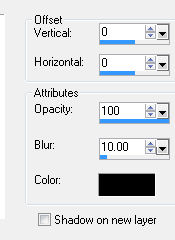
I gave the text a drop shadow in the light color, V&H at 0, Opacity 100 and Blur 10.
File-Export-As a JPG, and you're done!!
I hope you enjoyed it as much as I did writing the tutorial :-)

This tutorial is simply from my play. Any resemblance to other tutorials is accidental.
My Terms of Use for this tutorial are as follows: You may send the link to this tutorial, but Not the tutorial itself, to whomever you think will have fun with it. Groups are welcome to use the tutorial.
This page and tutorial are copyright to Janie Shipman, July 2010.
This site is best viewed at 1024x768, in Internet Explorer 6+.